You turn on your computer like you normally do and you log in to your Windows but you get that ‘Welcome’ circle that keeps on rotating for more than 10 minutes. This can be really infuriating when you’re trying to get your work done as soon as possible or ensure productivity in your work.
This issue has become rather common as Windows 10 is prone to slowdown hence making you almost chuck your laptop or desktop out the window. You might call it an issue with your hardware or maybe your computer is old so you might need to get a new one. But before you head over to purchase another computer, you might want to check if this is an issue created by the Windows OS first.
In a nutshell, if you are an avid Windows user chances are you get plenty of temporary files and additional programs to run along with core functions that Windows has to execute by all means. This can be a significant strain on your computer and a nightmare if your computer is of the 2005-2010 era.
However, with this how-to guide, you’ll be able to keep your computer speedy and efficient without spending extra money on a new computer overall.
Disclaimer
As a disclaimer, it is to be noted that this guide is for Windows 10 users only and currently does not focus on Windows 11 or the previous generations of Windows OS such as Windows XP.
Steps to speed up your Windows performance
Following are some steps (not in any specific order) that you can go for and implement to maintain the performance of your computer:
Restart your device
This step does seem a complete novice kind of step but it actually regulates and maintains the performance of your computer. As users normally use Windows 10’s ‘Sleep’ or ‘Hibernate’ option, though it does save the user a couple of 2-3 minutes it can dramatically slow down the device as these options make your PC carry on your work for hours nonstop.
Hence a proper restart is recommended with the additional step that you have closed all programs and processes.
Stay updated
Every now and then Microsoft launches new security patches and updates in order to improve the performance of Windows. That is why if you ignore these updates for the sake to avoid the ‘Getting your Windows updated … do not turn off your computer’ screen then that is a huge mistake. The updates and patches come in for a reason as they protect your computer from malware and ensure you have the latest tools to keep your computer up and running.
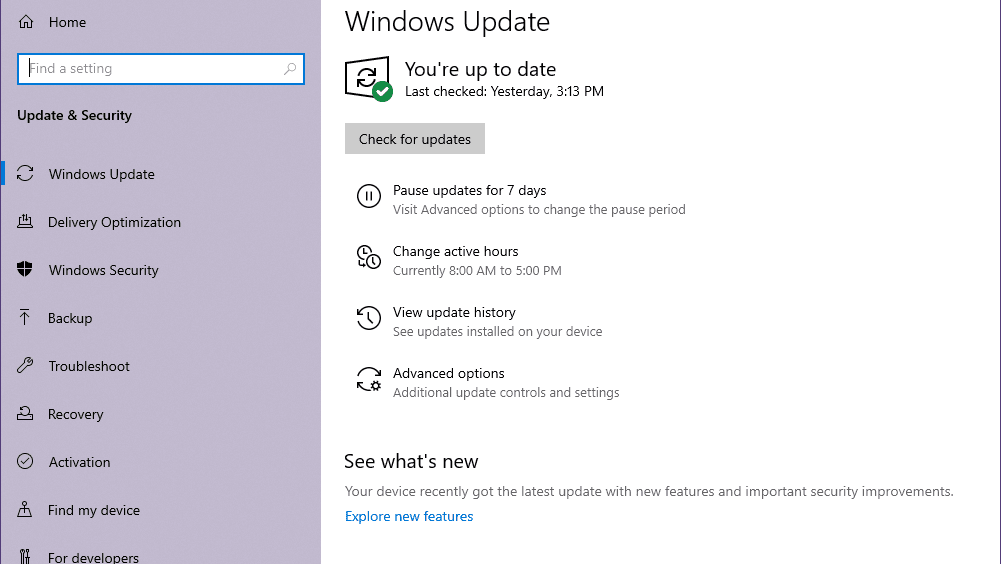
In order to check for the latest updates, first, make sure you have a stable internet connection. Then open Settings > Update & Security and then click on check for updates. If there is an update available make sure you save all your progress and close all processes before updating your OS.
Turn off startup apps
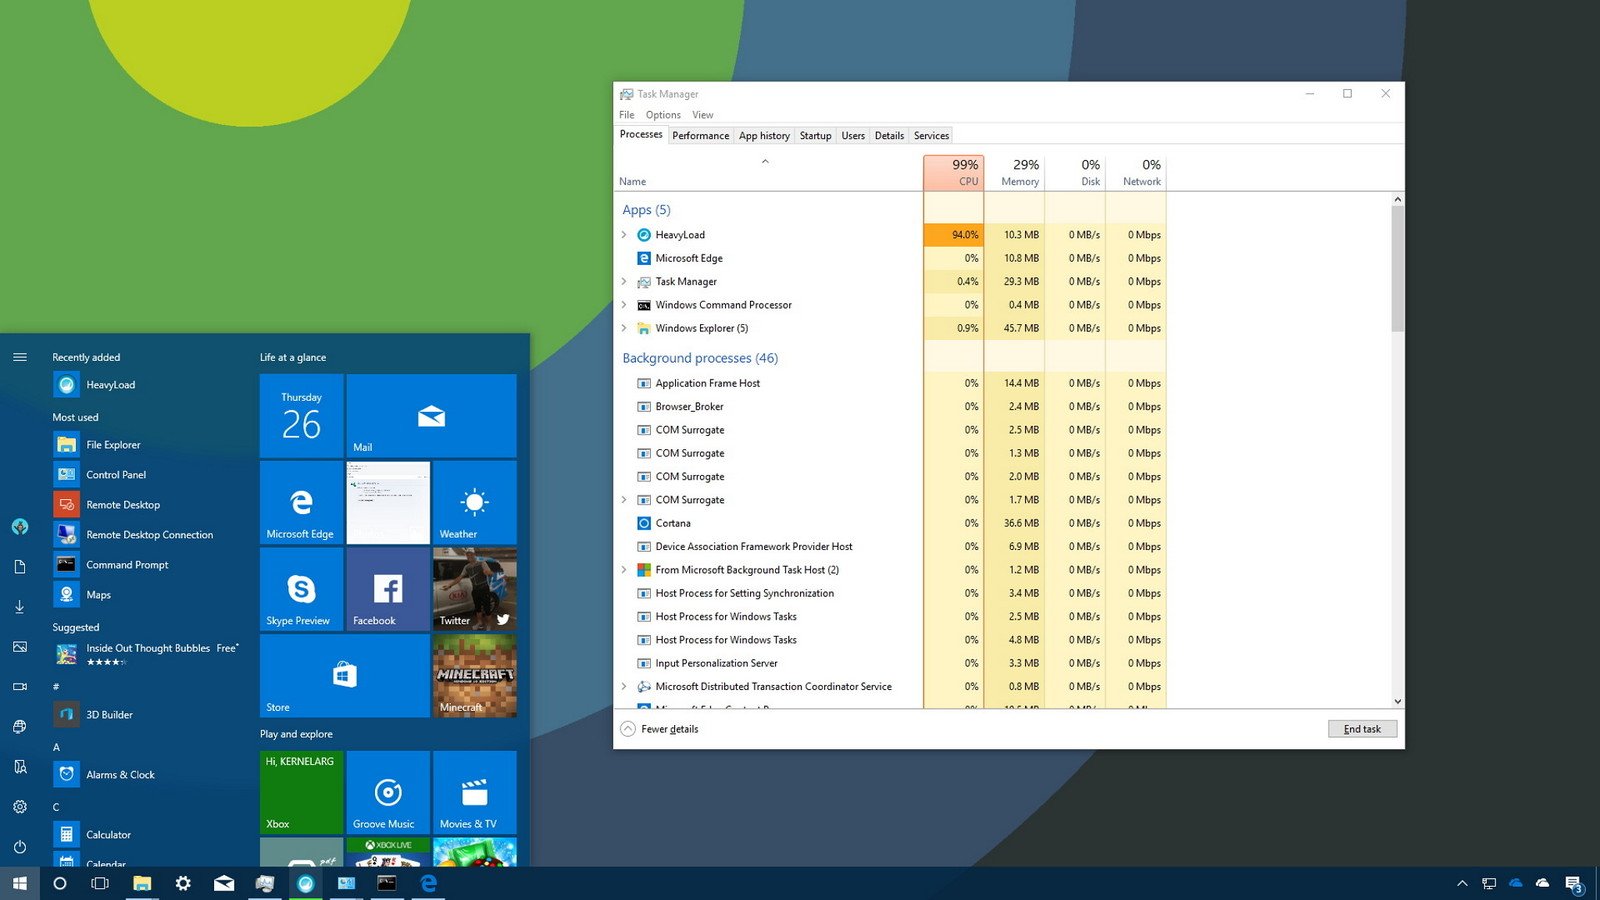
There are always those pesky apps such as Steam or Spotify that keep opening up whenever you turn on your computer. It does save you the time from manually searching the app and opening it but the bad news is it takes a lot out of your computer hence slowing it down on startup.
To know more about you can disable startup apps and programs, click the link below to know the full in-depth detail:
Read More: How To Stop Your PC From Launching Apps At Startup
However, the short version of this is to head to task manager and simply disable the app by right-clicking on it and select ‘Disable’.
Clean up the disk
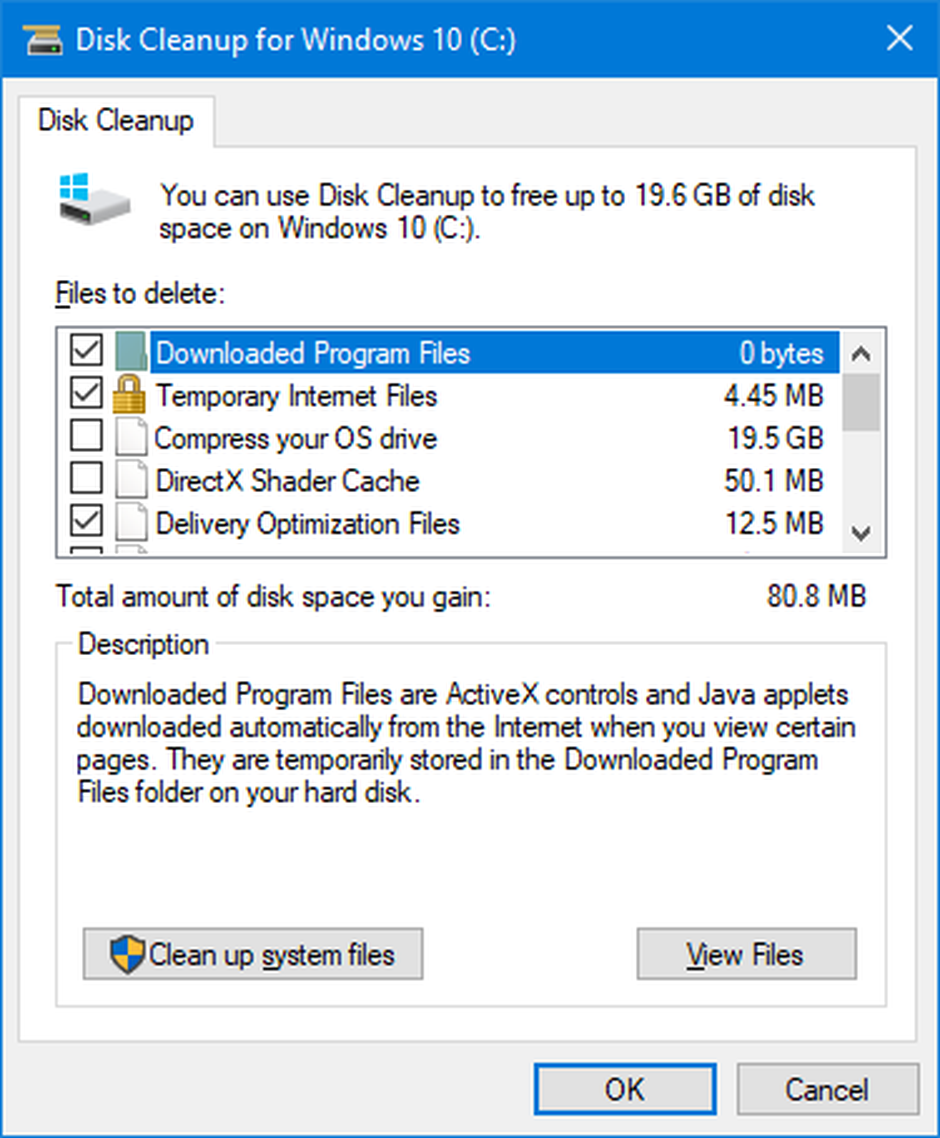
Normally a computer’s disk is loaded with temporary files after working on it for so long. As these files accumulate, they take up unnecessary storage space hence creating issues for your computer to execute certain tasks.
However, you can solve this issue by using Windows’ built-in Disk Clean-up option which you can search through the Windows 10 search bar on the bottom left.
Then select the drive you wish to clean up (if you have multiple), then select the files you want to remove, and simply click on ‘clean up system files’ in order to start the process.
Disable effects
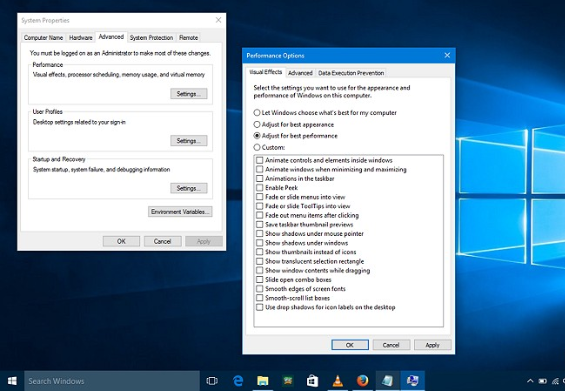
Though Microsoft has added some neat effects for users to personalize their PCs, it actually accumulates your computer’s resources.
In order to disable effects, press the Windows key + X, then select system and scroll down to ‘Advance Settings’. You’ll then notice a tab called ‘Visual Effects’ from where you can disable the effects you don’t want.
Run a proper system maintenance
Windows 10 also features a built-in system maintenance feature that allows users to scan for updates and remove malware or viruses.
To run proper system maintenance, open ‘Control Panel’ and select ‘Security and Maintenance’ from where you can begin a proper maintenance check on your system.
Switch to an SSD
Normally an HDD isn’t up to the task to handle our executions or store the proper files. If your traditional hard disk can not handle the day-to-day executions then it’s time to upgrade to a Solid State Drive (SSD).
Though these SSDs are expensive, they have significantly larger performance hence allowing your Windows 10 to run much quicker. However, it is important to check what kind of SSD you are installing and how much storage does it have but all in all upgrading to an SSD is truly worth it.
Conclusion
With all said and done if you have implemented any of these steps you would no longer have to keep on changing your computer after every 3 years. Let us know in the comments which method worked for you.